


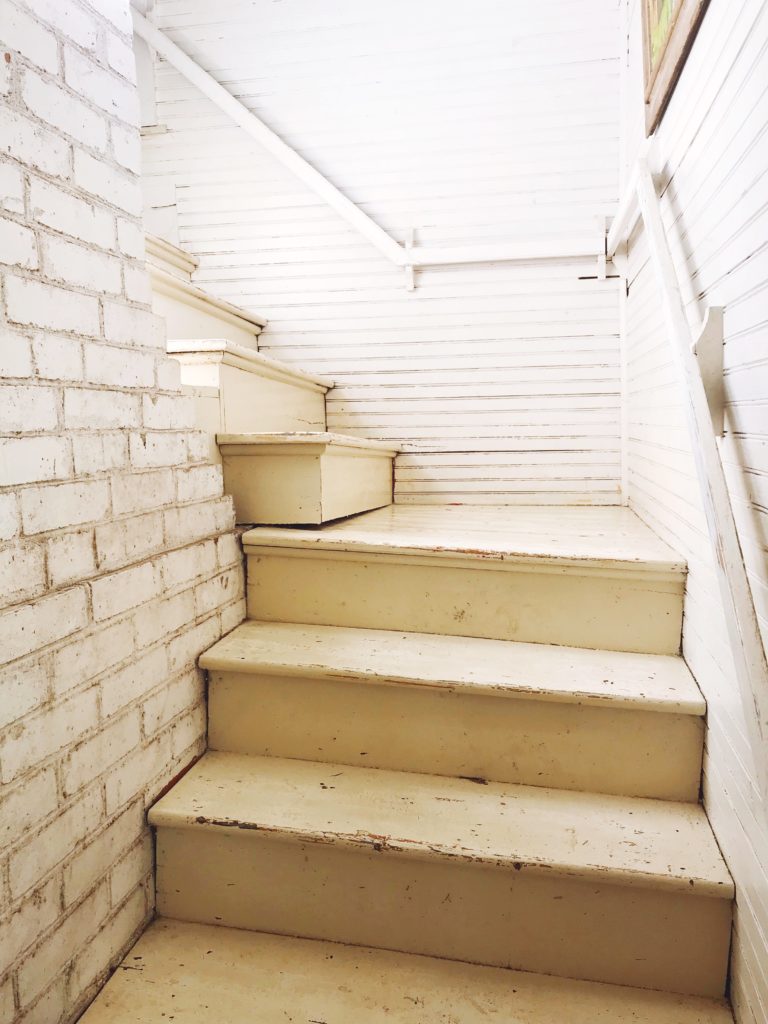
As we are getting closer to moving up to the lake for the summer, I am constantly perusing Pinterest in search of fun projects I can attempt. Today, I thought I would share with you one of the projects I did last summer, paint the stairs.
I’ve been wanting to paint the stairs at our lake house for years, but whenever we are there we have people constantly in and out and there never seems to be time to get it done. This past summer I had 4 days with no one in the house, so I thought I would go for it. It involved waking up at 2 am one morning to do a quick coat, but I got it done. It takes some planning but is a fairly easy project. It definitelty helps if you have some extra time with no one on the stairs.
Supplies
- Simple Green
- Orbital Sander (If you had access to one)
- Sandpaper – 120 & 220 grit
- Primer (Binz Shellac is my favorite)
- Deck Paint (See my tip in painting)
- Painters Tape
- Paint Brush
Prep
Like any good paint project, proper prep is key. Start by sanding and cleaning the stairs. I love Simple Green for any project as it isn’t as toxic. Then tape off the sides so you don’t get paint on the walls.
TIP: This project was for the stairs in our lake camp, so perfection wasn’t necessary, but if you need a more polished look you would want to use caulk and wood filler to make sure you have a smooth surface.
Prime
You can get paint that has a primer in it, but I always think it is best to use a primer first. For this project, I didn’t have the luxury of time to use a primer, but Binz Shellac is my favorite as it does a really good job of sticking and also will block any stains from coming through. It does smell a bit, but I used a mask (we all have those now) when I used it in my kitchen project. The drying time is not too long.
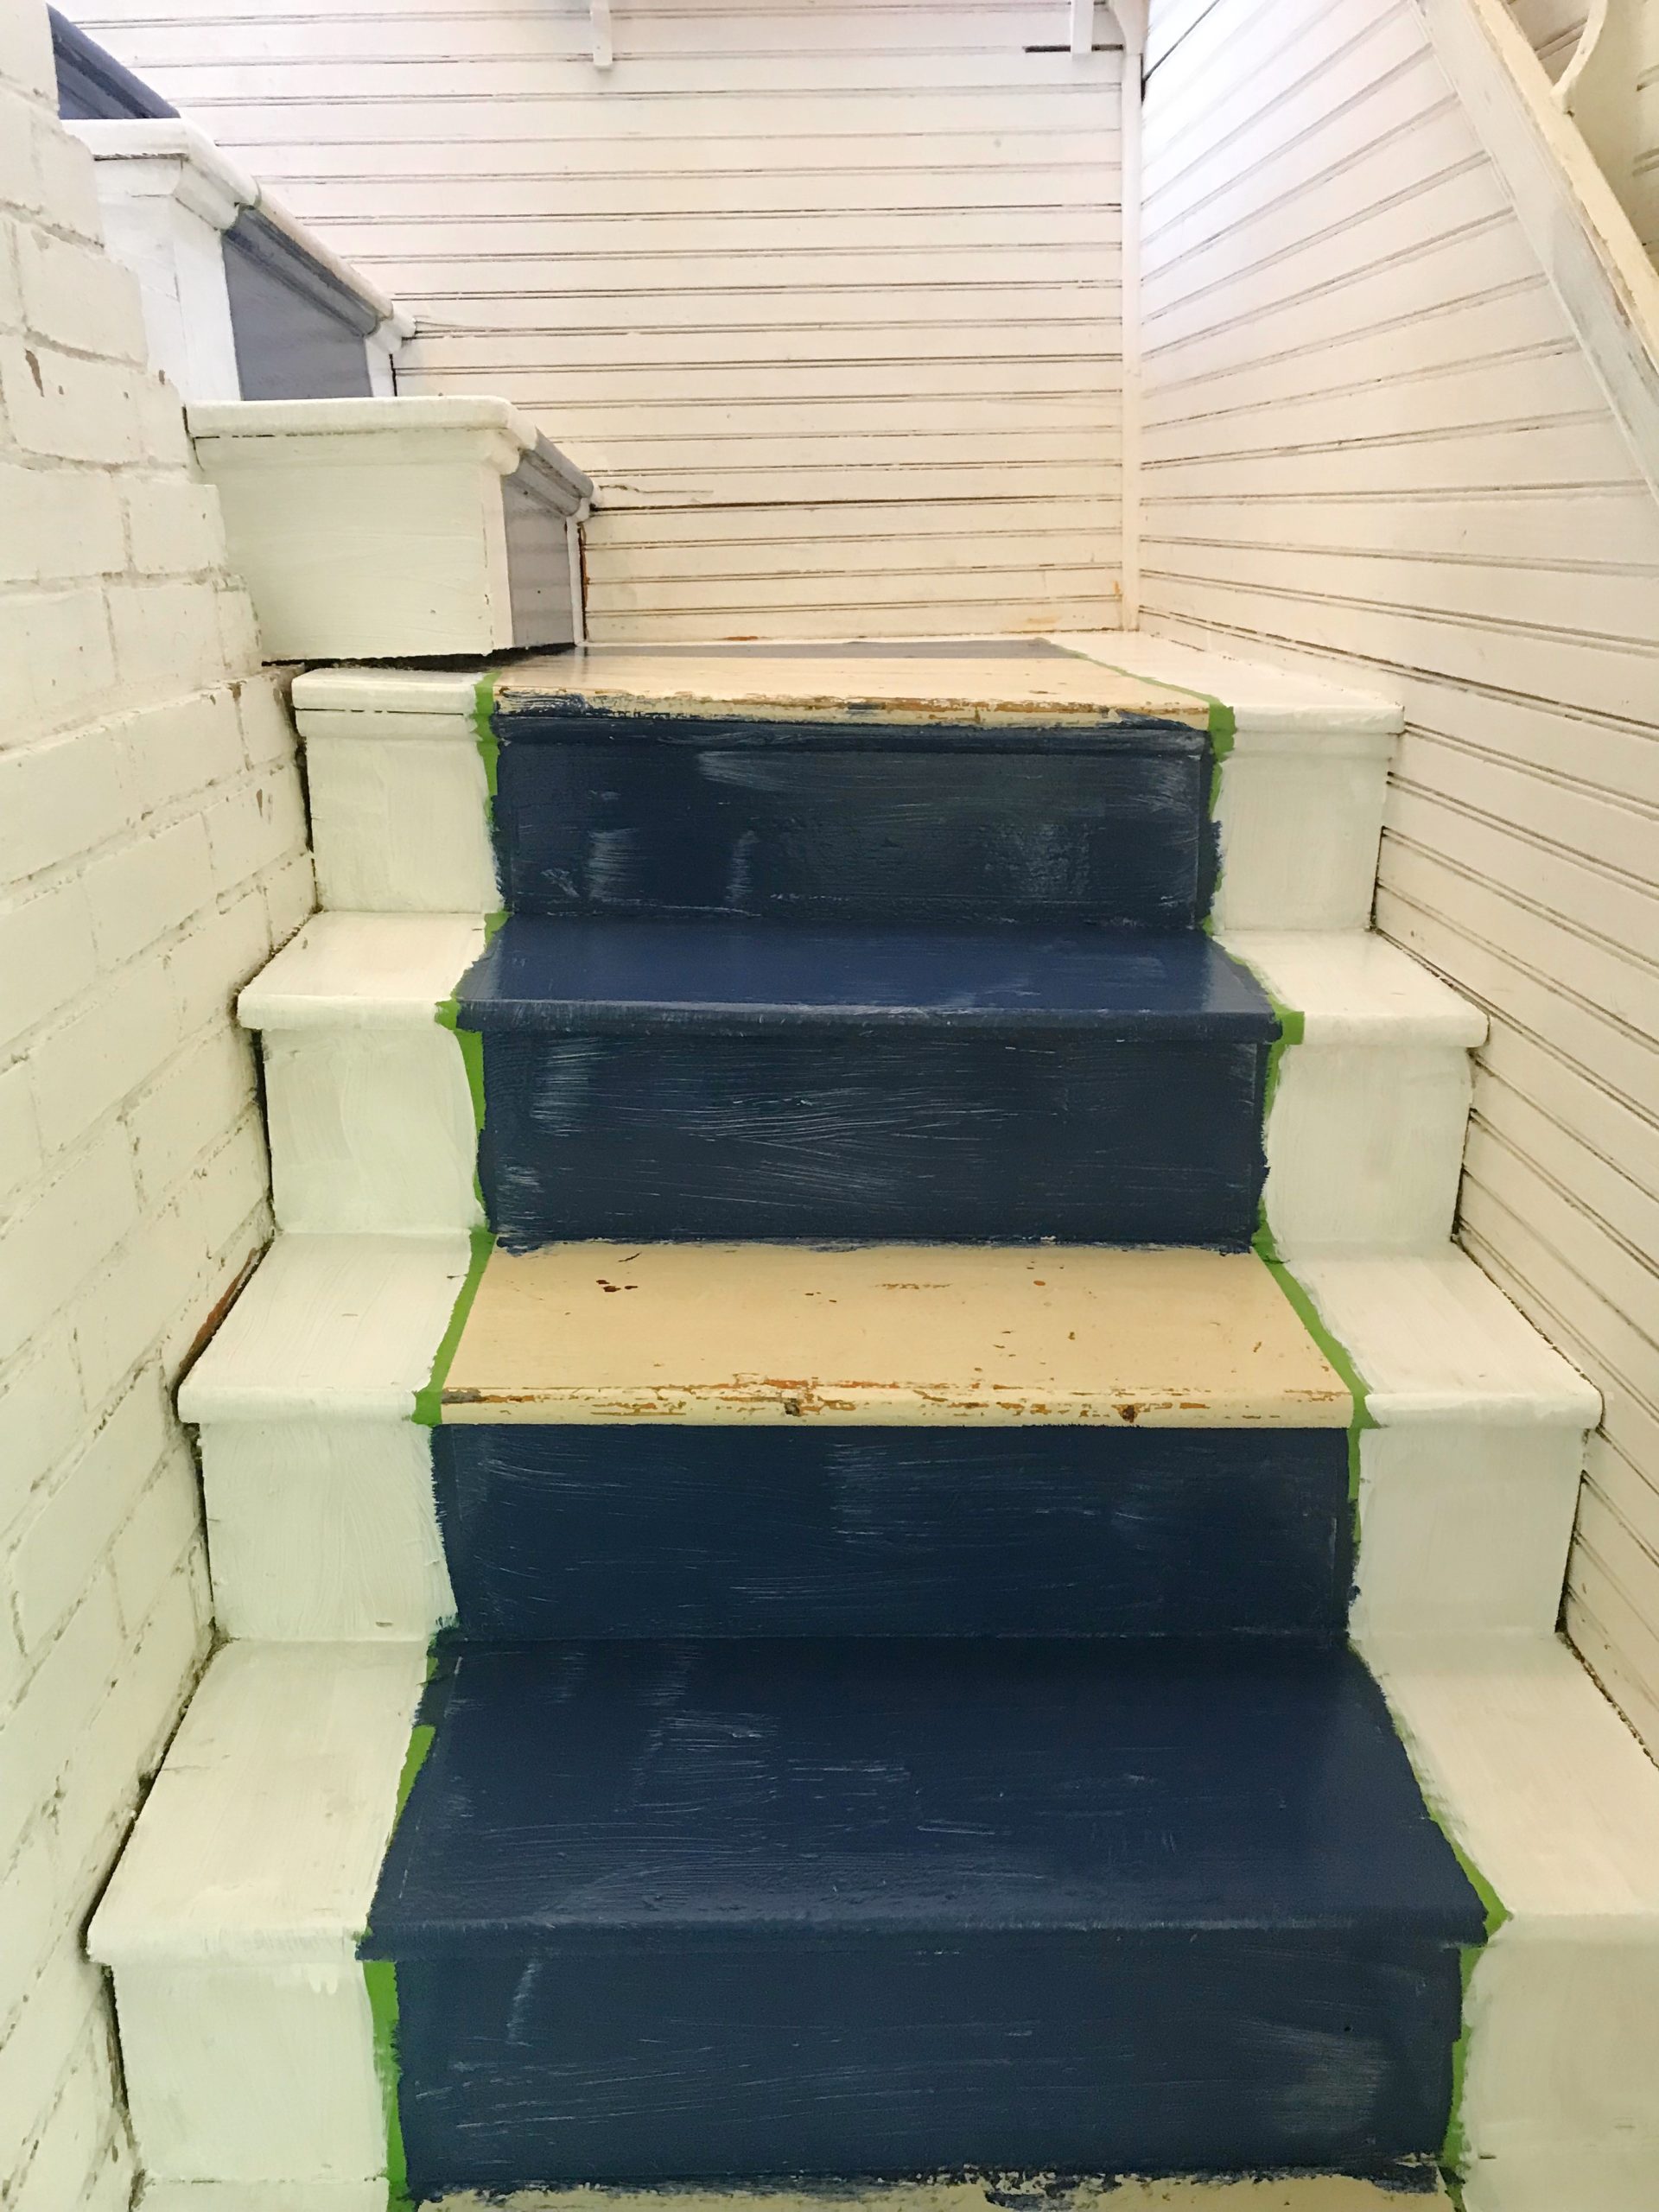
Tape
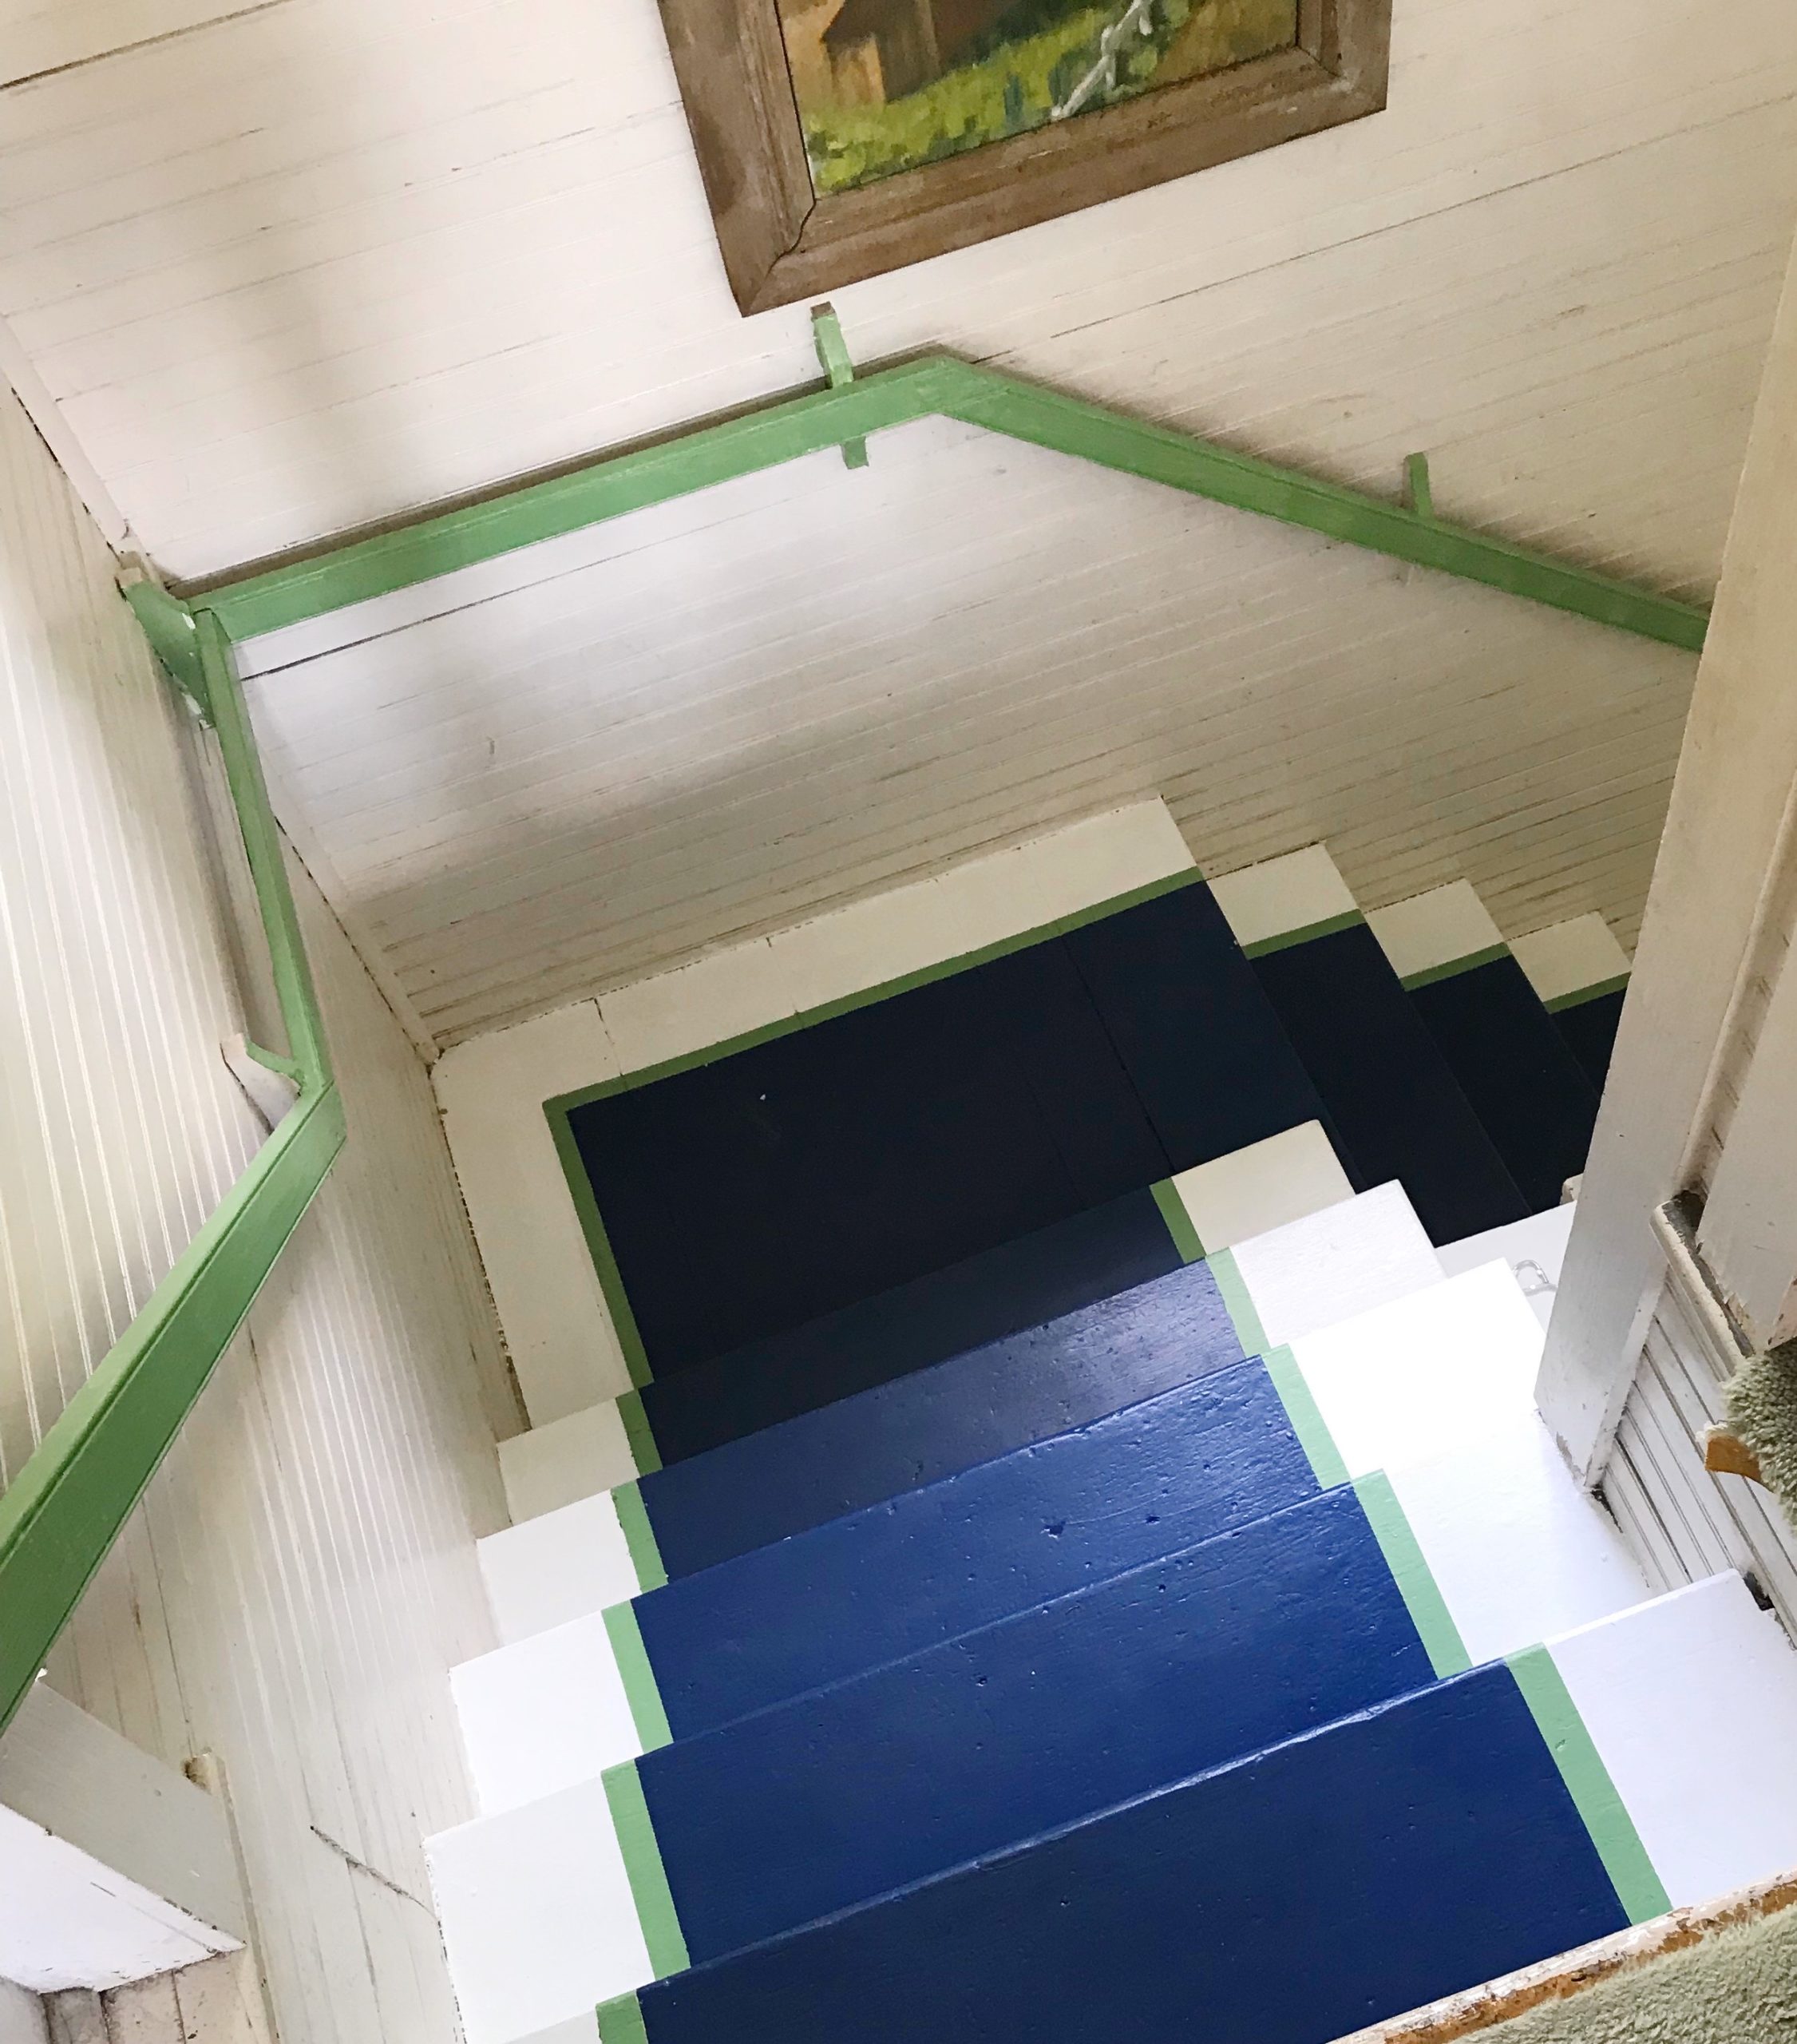
Now is the fun part. How do you want it to look? You can check out my lake Pinterest board for some inspiration. Think it through and map out how you will layout the tape and plan for what color you are going to paint first. Be patient and really spend some time taping and measuring out your lines. You will be glad you did. I like Frog Tape. Be careful when you take it off. (See my tips below)
Painting
Now for the fun part, but also the part that takes patience. I wish I had had more drying time to work with, but with a house with two families living in it, that wasn’t an option.
TIP: When looking for paint I would look for a quality Porch and Floor paint with a fairly quick drying time. I know that now where we can get paint is a little different than it used to be.
Start with your first color. If you have the time I recommend doing two coats of that color and letting it dry fully. Then carefully remove the tape and retape to get ready for the next color. Then repeat with the other color or colors.
The more you can let it dry after this the more successful the finish will be. And it people have to walk on it make sure they are in socks. No shoes or barefeet.
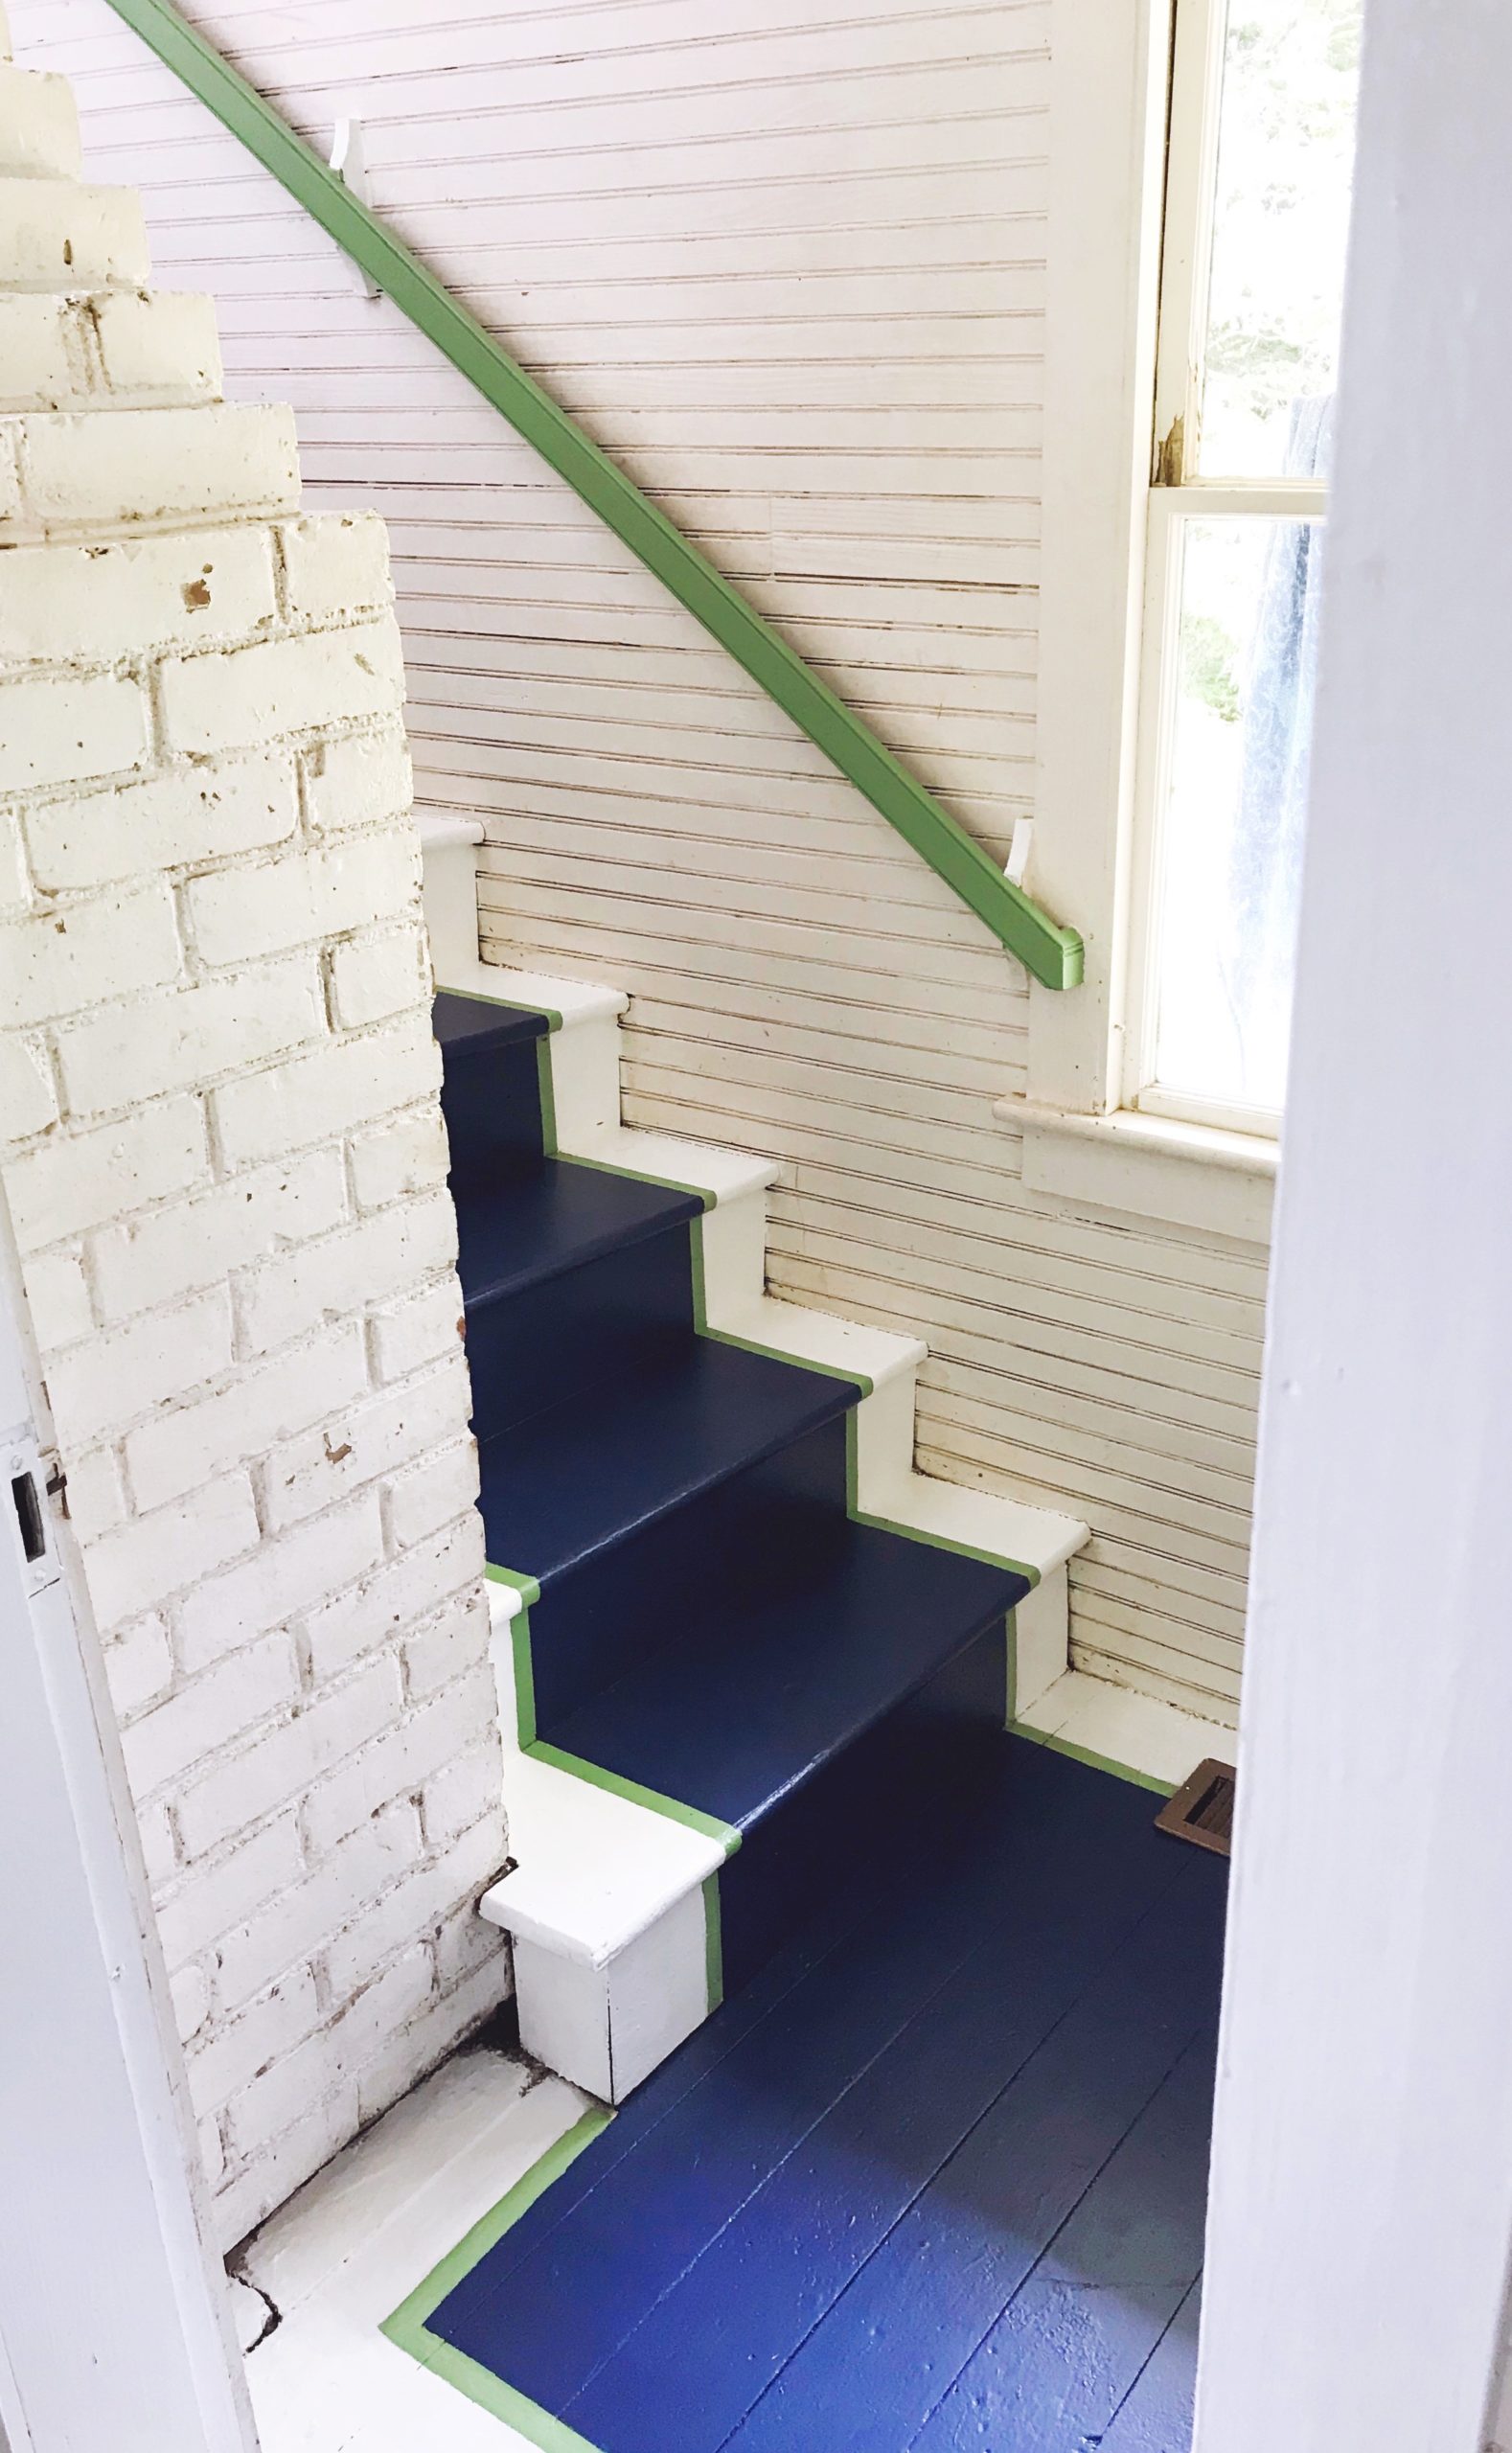
Fun Fact: For this project when I was painting I loved the way the Green Frog tape looked so I decided to add the green stripe.
TIP: When pulling off tape be very careful and slowly pull at an angle. Be especially careful when pulling up tape that is on the new paint. Really be patient so you don’t pull up paint.
Don’t forget to share with us if you try this project!


share this post on
comments
0
leave a comment