


When I think about my dream house the two biggest “wants” have always been a white kitchen and a laundry room, (not a closet but a whole room). While I love our home until recently we didn’t have either of these things. My husband is a builder and loves himself some beautiful wood, so the idea of painting the cherry cabinets was not that appealing to him. After a few nudges from outside sources, and many years of bugging he finally agreed to let me do it!
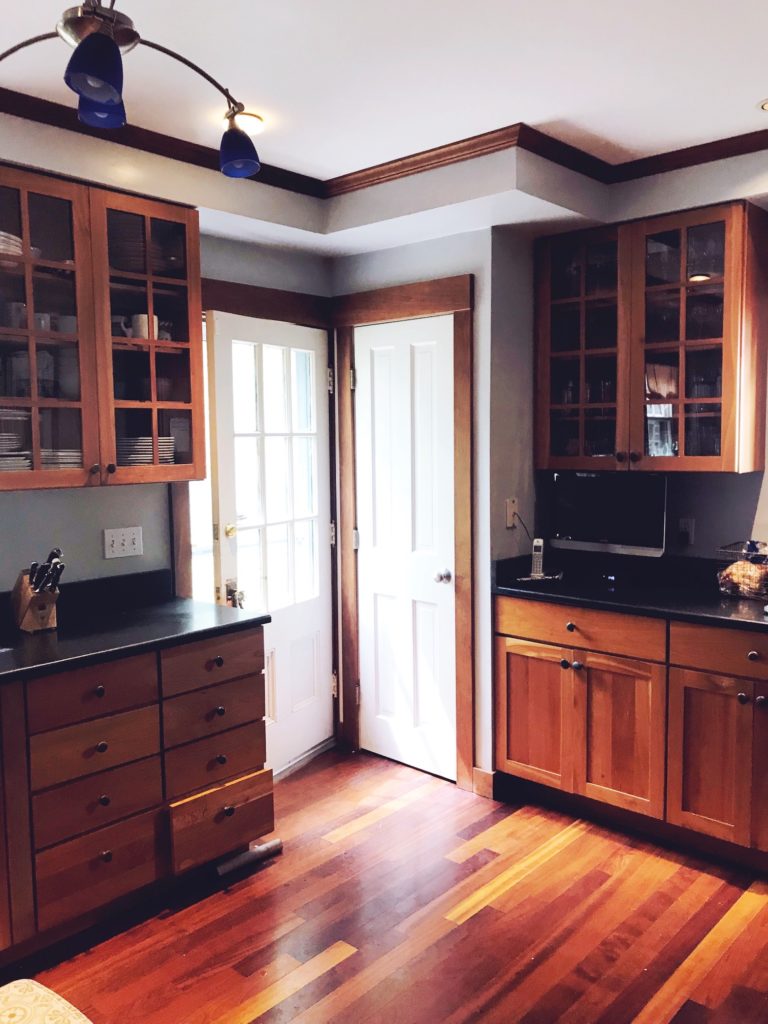
Before 
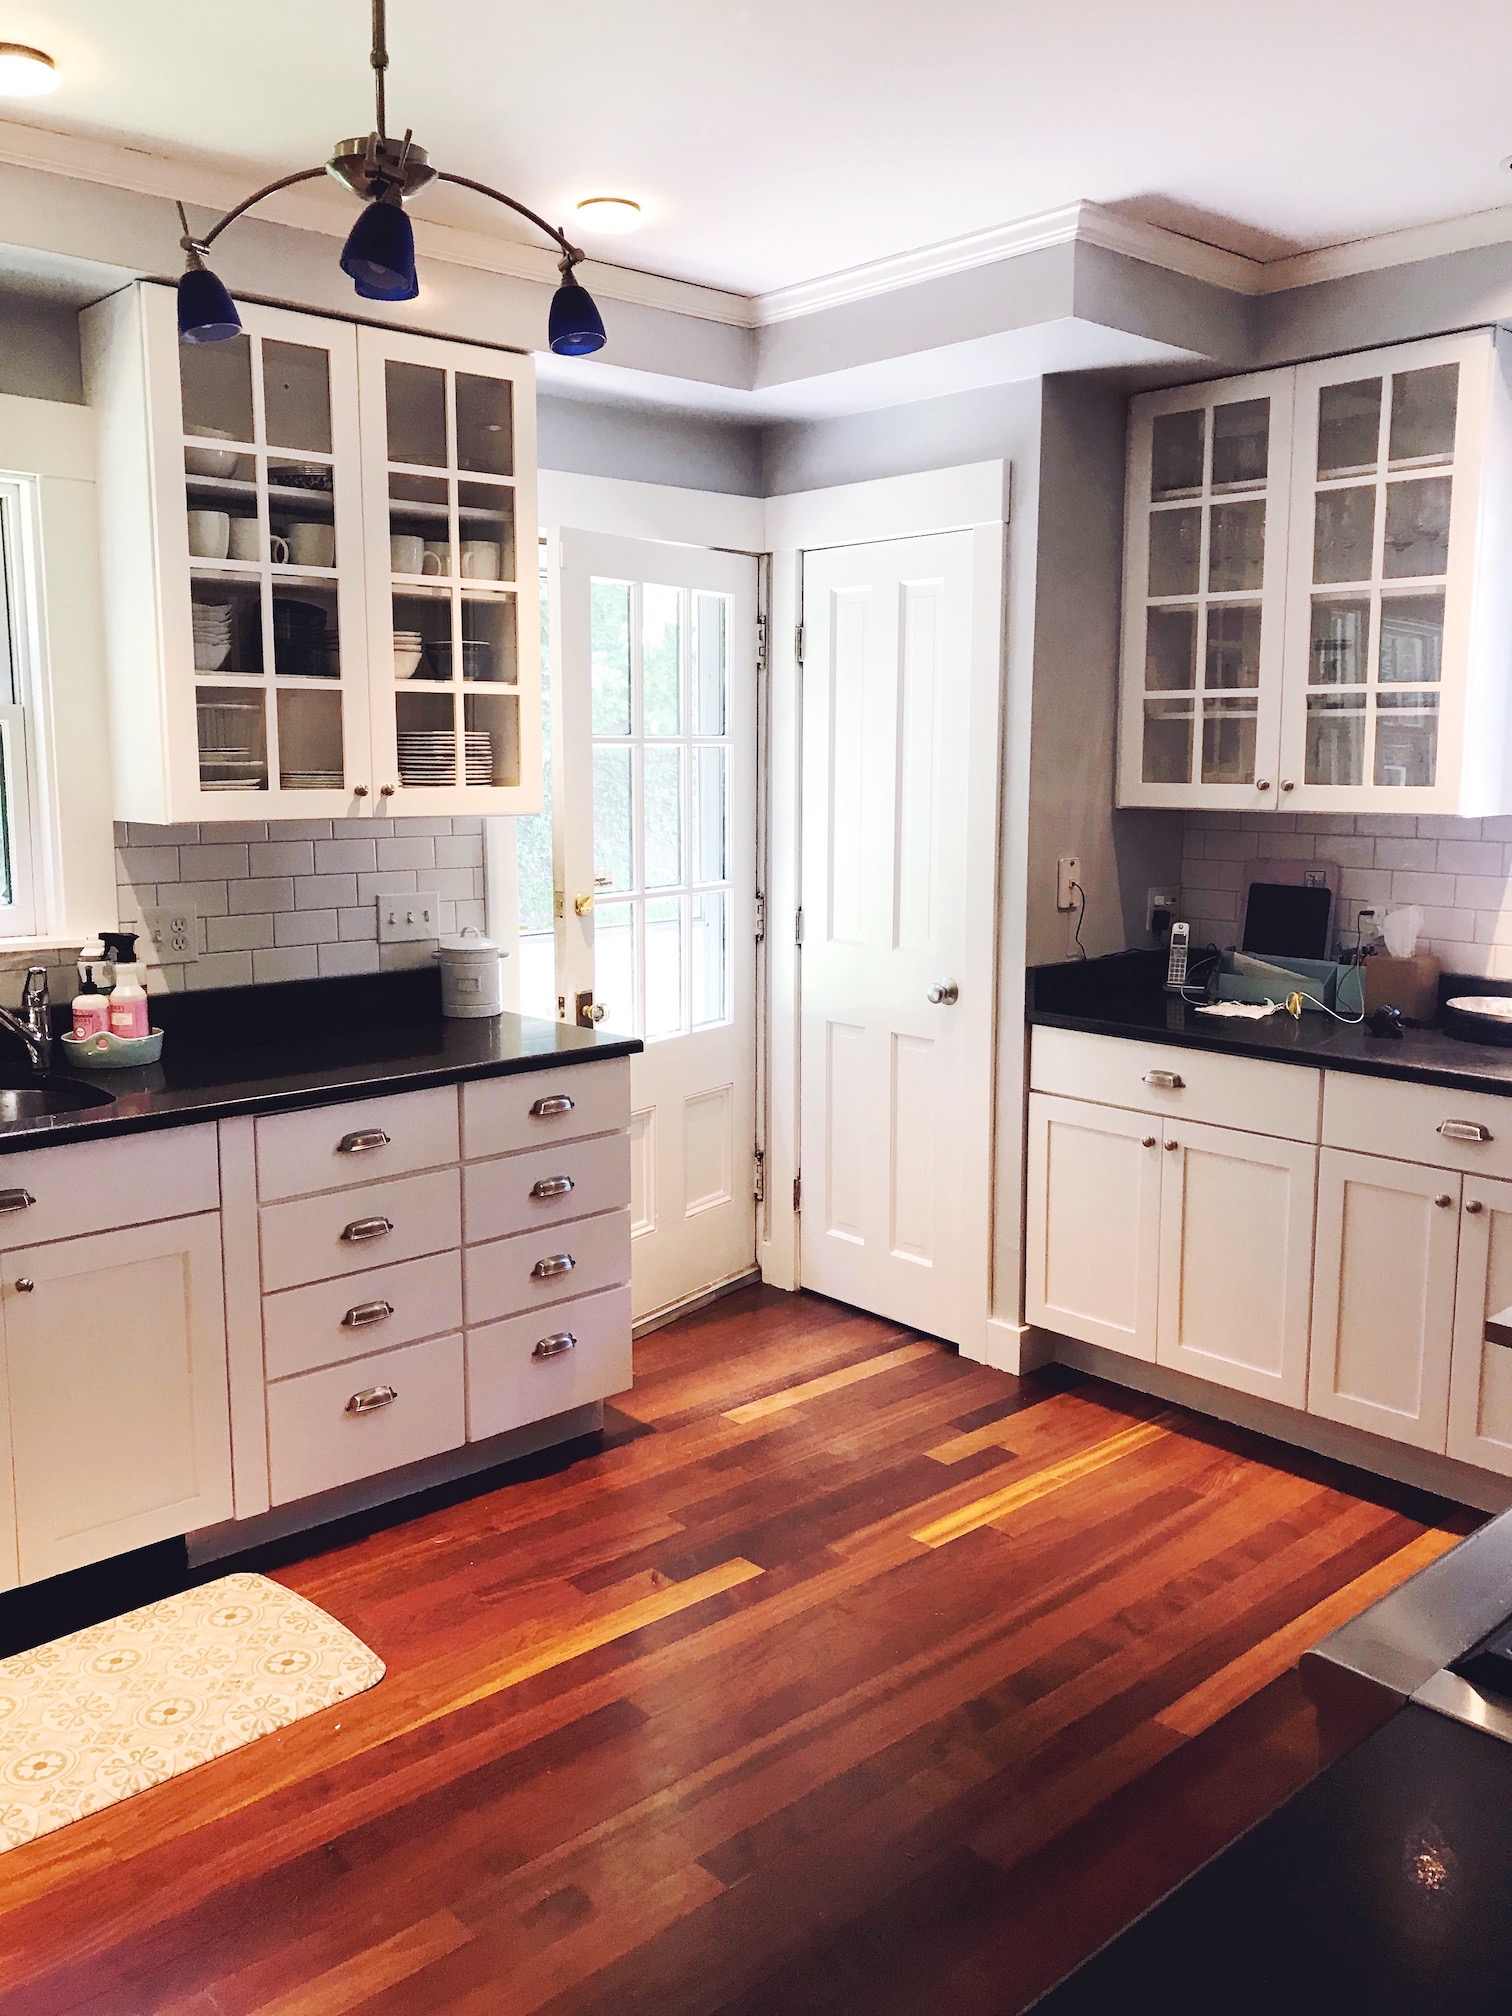
After
In my past life, I was a decorative painter and I hate paying someone to do something I know I can do, so I figured this project was right up my alley! It was totally doable, and I have to say I rocked it, but it was definitely a bigger job than I had anticipated.
For those of you that like to get your hands dirty with a good project or looking to make a big change on a tight budget, I will share with my process and what I used.
This post contains some affiliate links which means if you make a purchase I might earn a small commission, but it will not cost you a penny more. All opinions are my own and I only share products and services that I love and think that you will love too!
Prep, Prep, Prep
When it comes to painting, I like a shortcut as much as the next guy, but I knew that if I was going to re-vamp the kitchen I had to do it the right way so I wouldn’t have to re-do it again in a few years. I have learned over the years that the projects I didn’t fully prep for have not stood the test of time. While prep work is quite a pain, in the end, it is worth it.
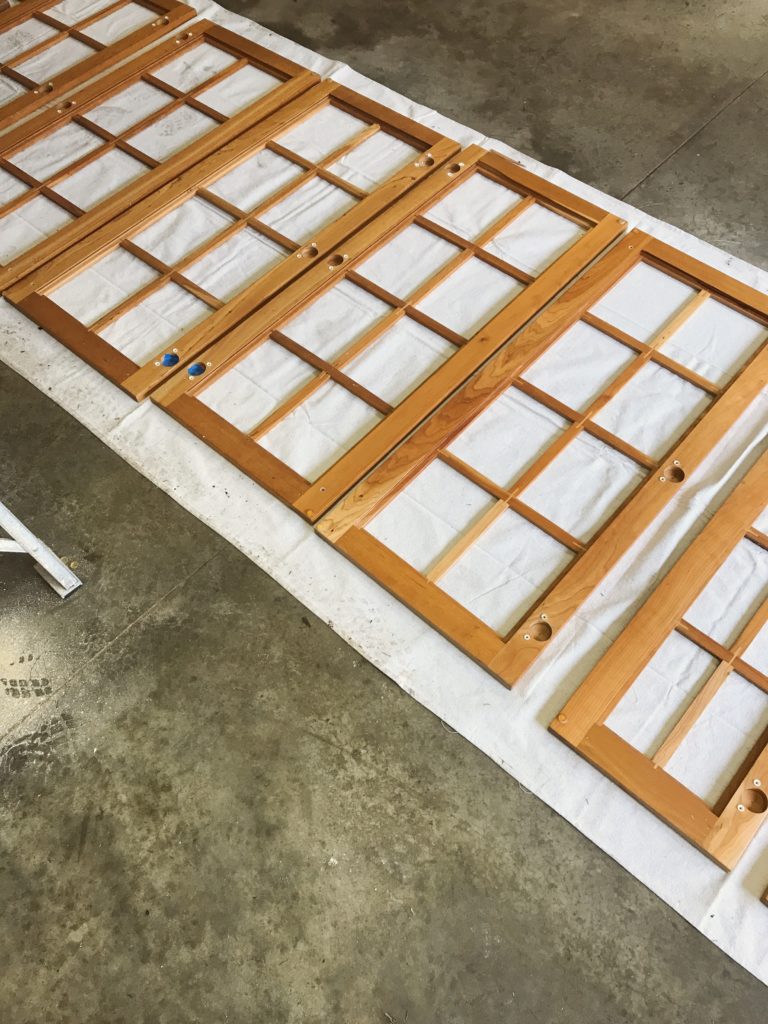
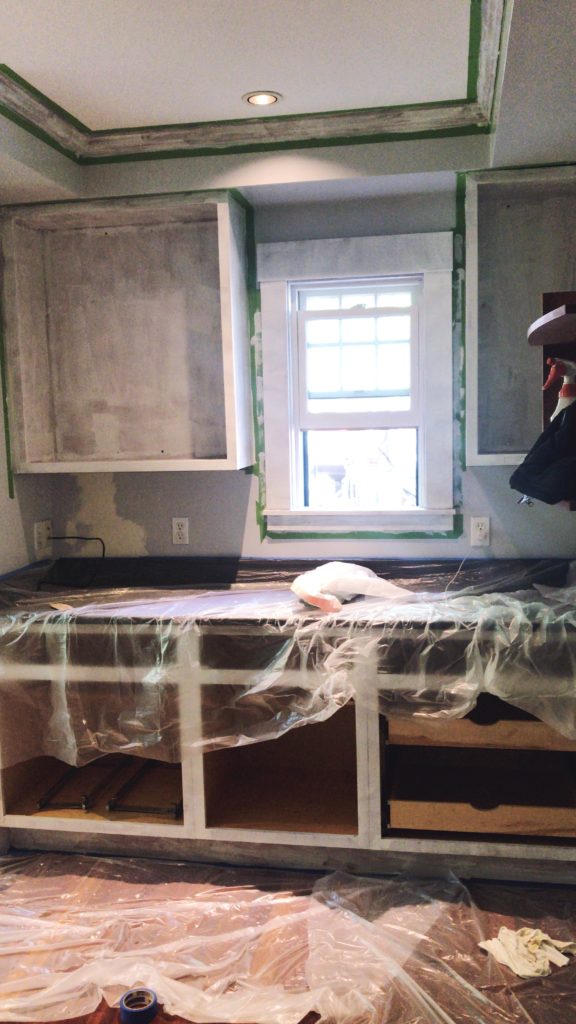
- The first step is to remove all the cabinet doors and any hardware. I recommend labeling all the doors as you take them off to make sure they go back in the right place. I just stuck some painters tape, labeled them and made a simple chart.
- Next, I took everything out of the kitchen and put it in the dining room. (I swear what I saved in doing it myself we spent in take-out.)
- Sand – this is a big job, but you want to use a #220 sandpaper to rough up the surface to help the paint adhere better. Because I have a great primer to recommend you don’t have to go crazy, but definitely rough up the surface a bit.
- Clean! No matter how clean your kitchen is, grease steam and flying food have probably built up on your cabinets. I like to use simple green because I don’t like using the more toxic cleaners, and with a good primer that should be enough. Also, always vacuum after you sand.
- Tape off your walls and counters, and floors. I like using frog tape.
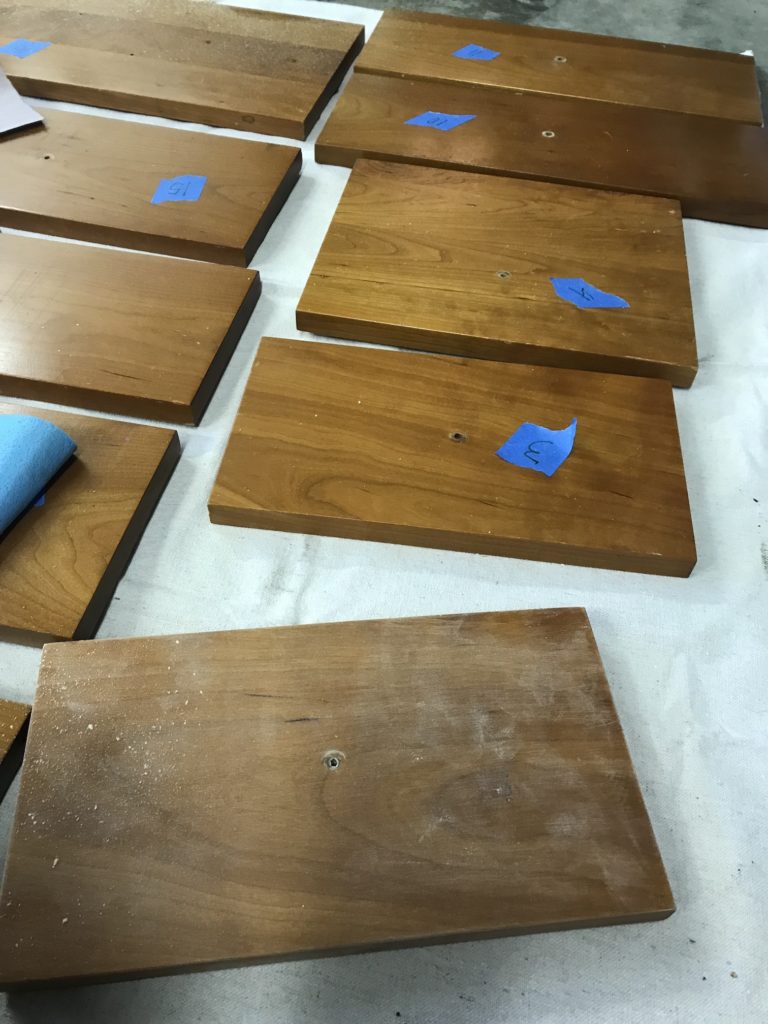
Prime
A good primer can make all the difference. I had never done a kitchen before so I wanted to do some investigating outside of just asking my local ACE guy. Since my husband, Tommy is a builder he and his co-workers are a great resource. They told me there was only one option, Binz shellac primer. While it is a little stinky to work with, it dries very quickly and is an awesome stain blocker.
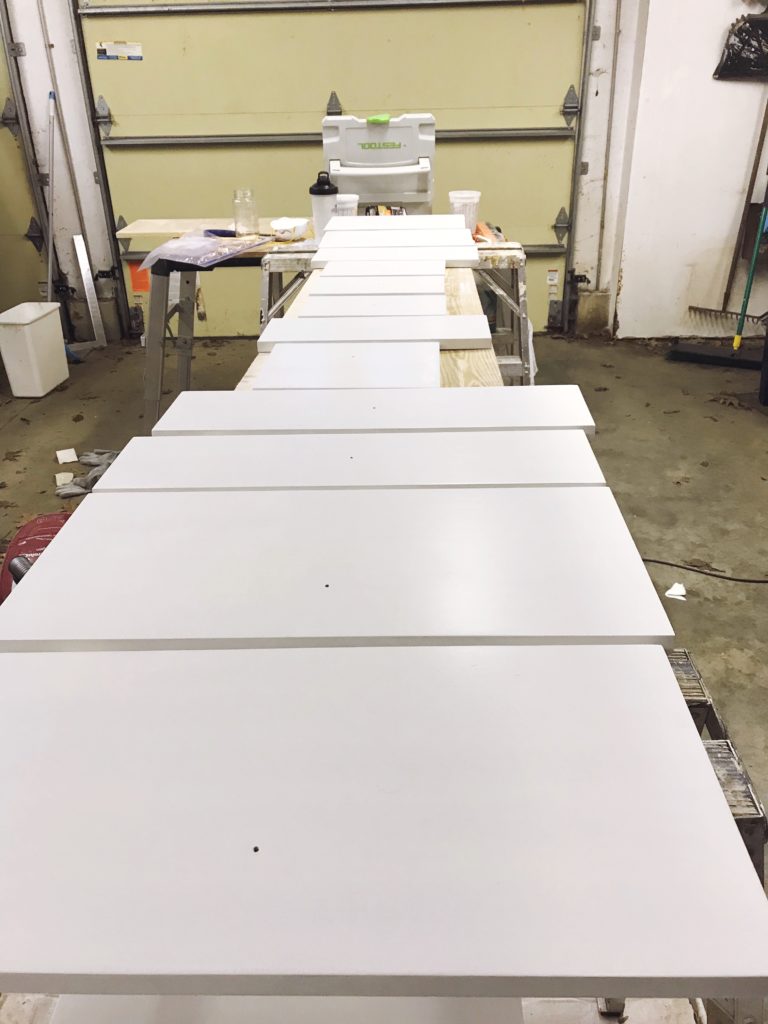
- I started with the cabinet doors and lined them up in the garage.
- I recommend two coats of primers for a kitchen. You want to make sure that you have a good base and this is a good stain blocker in case there is any leftover grime on your cabinets.
- Spraying can go faster, but unless you are a spraying pro I would just stick with a brush. Here is a brush from home depot that will work.
- After each coat use #120 sandpaper to lightly sand before the next coat.
After you have primed all your cabinet covers and the cabinet shell’s in your kitchen you are ready to move on to the main show.
Paint
You made it, you have gotten to the final round! it’s time for the final coats. I am a Benjamin Moore gal and so that is what I used for this project and I was quite pleased with it. They one I used was Benjamin Moore Advance Interior Satin Paint. Chantilly Lace and Decorator’s White are two of my favorite shades of whites for cabinets.
- Do the first coat much like you did your primer.
- Lightly sand cabinets with #120.
- For the final coat, I applied the paint with one brush and then took a flat brush and lightly skimmed the surface to create a professional-looking brush stroke.
Make sure to really give the paint time to dry before you put all the cabinets back on. You don’t want to ding it and have to start all over.
TIP: If you are painting your cabinet doors in your garage I recommend keeping the doors closed while doing the final coats. Otherwise, you will end up with floaters on your doors and will have to do additional coats. Unfortunately, I learned this the hard way.
Hardware
After all this work I wanted something a little flashy to put on my new kitchen cabinets so I went to Restoration Hardware to get a little bling for my new kitchen.
Here are the knobs that I got:
We also added some white subway tile – that was a project that Tommy helped with! The whole process took about two weeks because I still had to drive kids to school, walk the dog and play the occasional tennis match. If you don’t have to do all that you could probably get it done in a week.
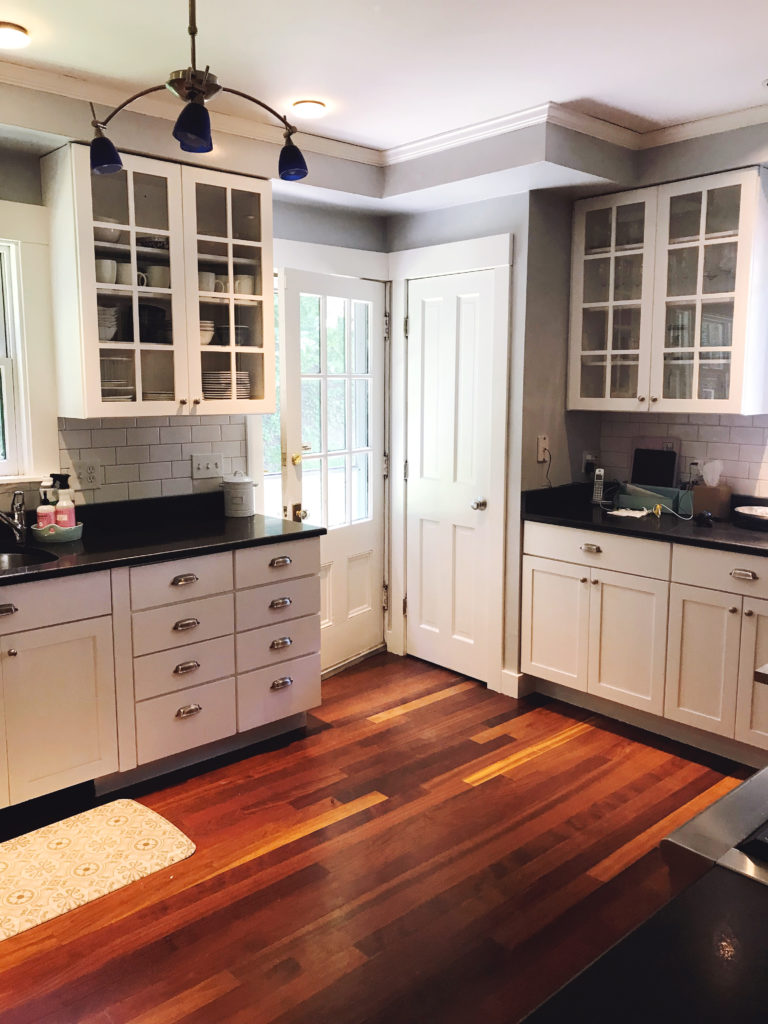
This project is definitely a lot of work, but it is the best way to make a major change in your kitchen for a very low cost. My kitchen is so much brighter, that even my dark wood loving husband wishes we had done it years before.

UPDATE: If this seems very overwhelming (it was), check out blogger Tasha from Kaleidoscope Living. She has a way of repainting the kitchen cabinets without taking everything out and all the sanding.


I guess I didn’t really know how much detail went into this project. Now I grovel at your feet! The end result was worth every moment you spent prepping, sanding and painting, because it is now a designer kitchen you will love forever. Way to stick with it! LYM!
I’ll stick to paying someone. Yikes! Too much work and detail for me and even if I followed every instruction, it would still look like an amateur did it. Bravo! It looks beautiful!
Thank you. It was definitely a labor of love and shows how badly I wanted a white kitchen 🤣!